- Published on
Podman - An excellent alternative to Docker
- Authors

- Name
- Angelos Panagiotopoulos
- @angelospanag
Intro
Podman has recently released a desktop client for managing containers. For anyone not familiar with it, Podman is a free and opensource engine for managing and running OCI containers, based on open standards, while aiming to keep compatibility with Docker commands.
As their official documentation mentions:
Simply put: alias docker=podman
...and your Docker container workflow should work with no changes.
Creating a FastAPI app and containerising it with Podman
I wanted to put that to the test using my favourite web framework during the last years, written in Python: FastAPI.
Creating a basic FastAPI skeleton app and sample endpoint
Starting simple and creating a basic skeleton for our app, while initialising dependency management with another one of my favourite tools, Poetry:
mkdir fastapi-podman
cd fastapi-podman
poetry init
We add the necessary runtime dependencies, FastAPI for the web framework and uvicorn for the ASGI server:
poetry add fastapi uvicorn[standard]
Last but not least, adding my minimum go-to linting and formatting libraries as development dependencies:
poetry add flake8 pep8-naming black --group dev
Next we create a very simple project skeleton, an app folder that for simplicity will contain all our Python code as a module:
mkdir app
touch app/__init__.py
touch app/main.py
In our main.py we can now create a simple FastAPI GET endpoint in root that will return a "Hello World" message in JSON format.
from fastapi import FastAPI

app = FastAPI()


@app.get("/")
def read_root():
    return {"Hello": "World"}
We can now run the app using uvicorn by pointing to the FastAPI entrypoint:
uvicorn app.main:app --reload
Finally, we can test if our defined endpoint works correctly:
curl -i localhost:8000
  % Total    % Received % Xferd  Average Speed   Time    Time     Time  Current
                                 Dload  Upload   Total   Spent    Left  Speed
100    17  100    17    0     0   2990      0 --:--:-- --:--:-- --:--:--  4250HTTP/1.1 200 OK
date: Thu, 10 Nov 2022 14:34:22 GMT
server: uvicorn
content-length: 17
content-type: application/json

{"Hello":"World"}
Creating a Containerfile/Dockerfile for FastAPI
Inspired by the official example from the FastAPI documentation, we can use Docker multi-stage building for creating our final image. The first stage aliased as requirements-stage will install Poetry, copy the Poetry files that track the project's dependencies defined in pyproject.toml and locked in poetry.lock, and finally generate a requirements.txt.
The second stage, which will be the one that our container will use to run, will use this generated requirements.txt to install the Python dependencies, copy the required Python project files, and finally run our server with uvicorn.
Notice how the Dockerfile syntax remains the same (WORKDIR, COPY, RUN etc.) and we can even use the same tags (FROM python:3.11) for referencing the official Python 3.11 image currently available in DockerHub. Podman will fetch it and build it locally with no problems.
FROM python:3.11 as requirements-stage
WORKDIR /tmp
RUN pip install poetry
COPY ./pyproject.toml ./poetry.lock* /tmp/
RUN poetry export -f requirements.txt --output requirements.txt --without-hashes
FROM python:3.11
WORKDIR /code
COPY /tmp/requirements.txt /code/requirements.txt
RUN pip install --no-cache-dir --upgrade -r /code/requirements.txt
COPY ./app /code/app
CMD ["uvicorn", "app.main:app", "--host", "0.0.0.0", "--port", "80"]
Using podman commands to build and run our app in a container
Build a Podman image
The following command will build an image from a Dockerfile in the same directory that it runs from (. character) and tag it as fastapi-podman. Notice how it is exactly the same as the Docker command we would use, the only difference is that we replace docker with podman.
podman image build -t fastapi-podman .
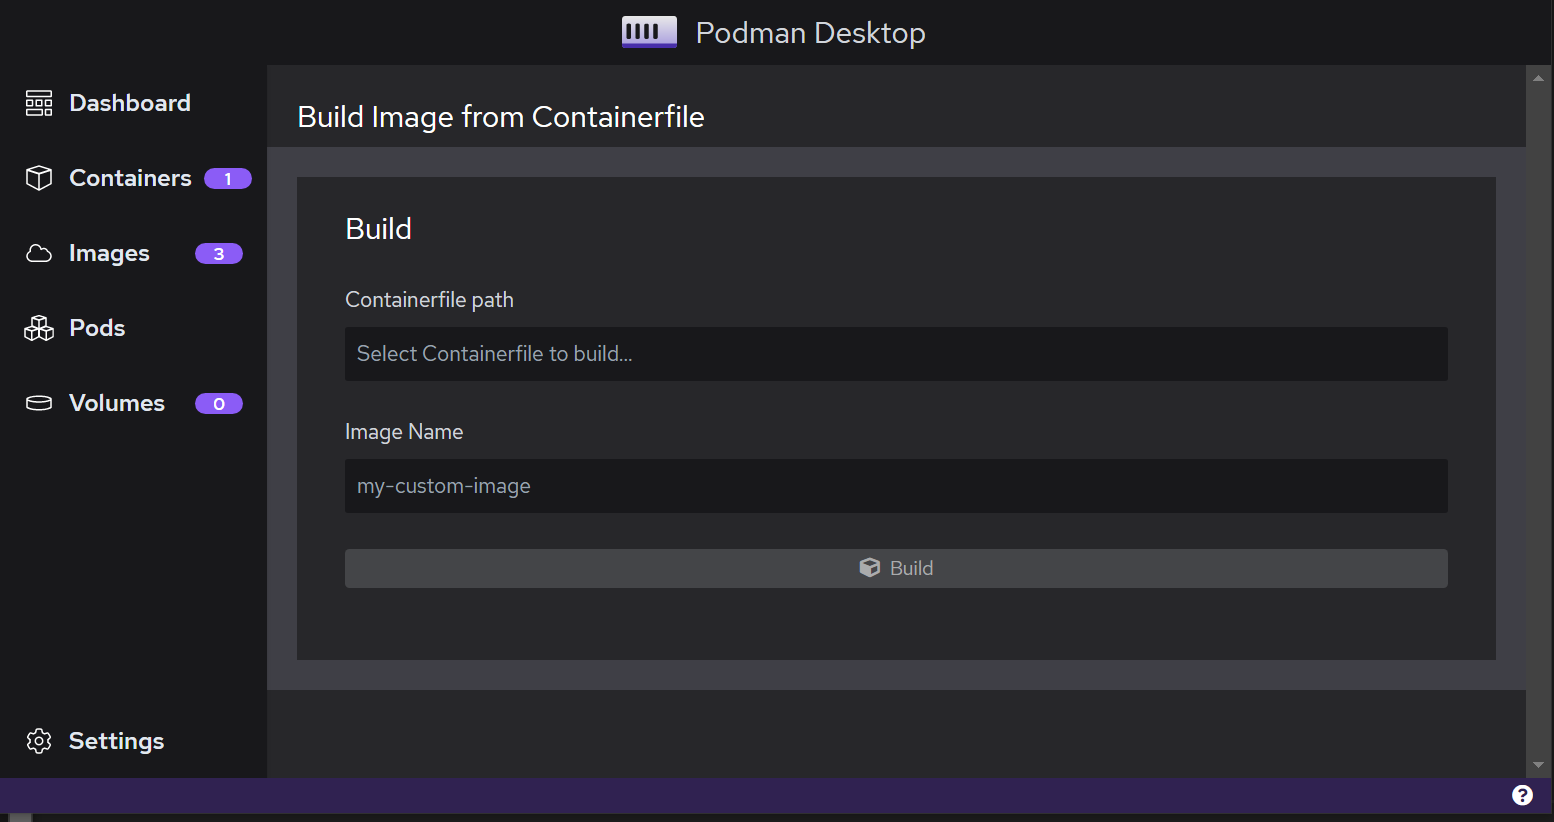
Alternatively, if you prefer to do the same using Podman Desktop and point to the Dockerfile (or at this point, more preferably Containerfile?):
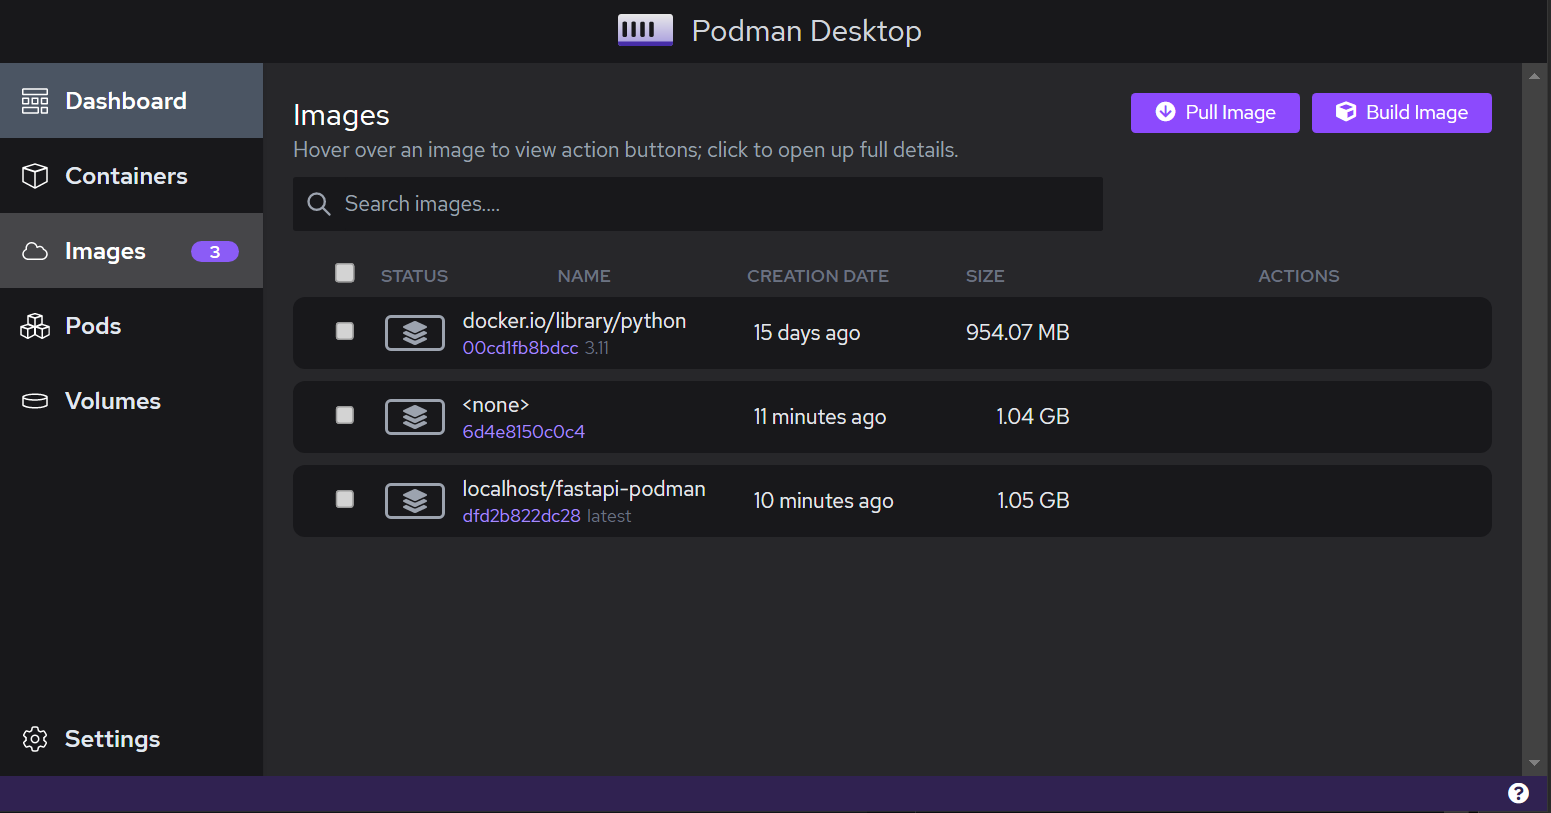
Our images now show up in the Images menu. For example, we see docker.io/library/python which corresponds to the official Python 3.11 image we used as a base for our Dockerfile, <none> which is the intermediate requirements-stage image we built above and finally localhost/fastapi-podman which corresponds to the final image that we will run as a container.
Running a container
podman container run -d --name fastapi-podman -p 8000:80 --network bridge fastapi-podman
Again if you are familiar with Docker commands, there is complete parity with its Podman equivalent, the flags remain the same:
-d- run the container as a daemon--name fastapi-podman- assign a name to the container-p 8000:80- map the local port8000to the container port80--network bridge- run the container in a bridge networkfastapi-podman- point to the previously tagged image
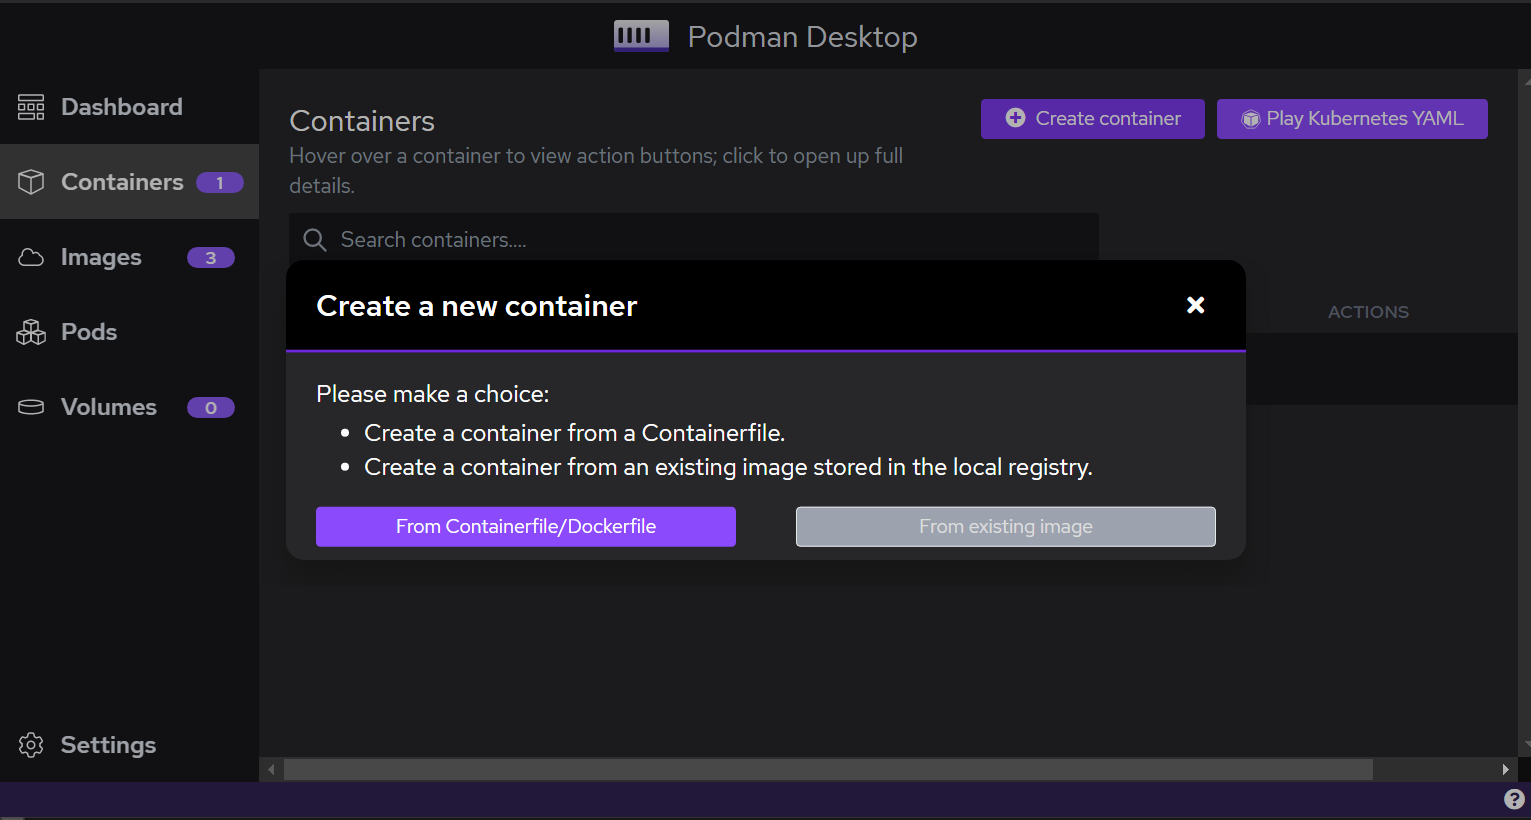
Alternatively, you can create a container from a Dockerfile/Containerfile or from an existing image in the local registry:
We can always check our running containers from the command line:
podman ps

CONTAINER ID  IMAGE                            COMMAND               CREATED       STATUS             PORTS
    NAMES
a2ff966fc6fd  localhost/fastapi-podman:latest  uvicorn app.main:...  10 hours ago  Up 18 minutes ago  0.0.0.0:8000->80/tcp  fastapi-podman
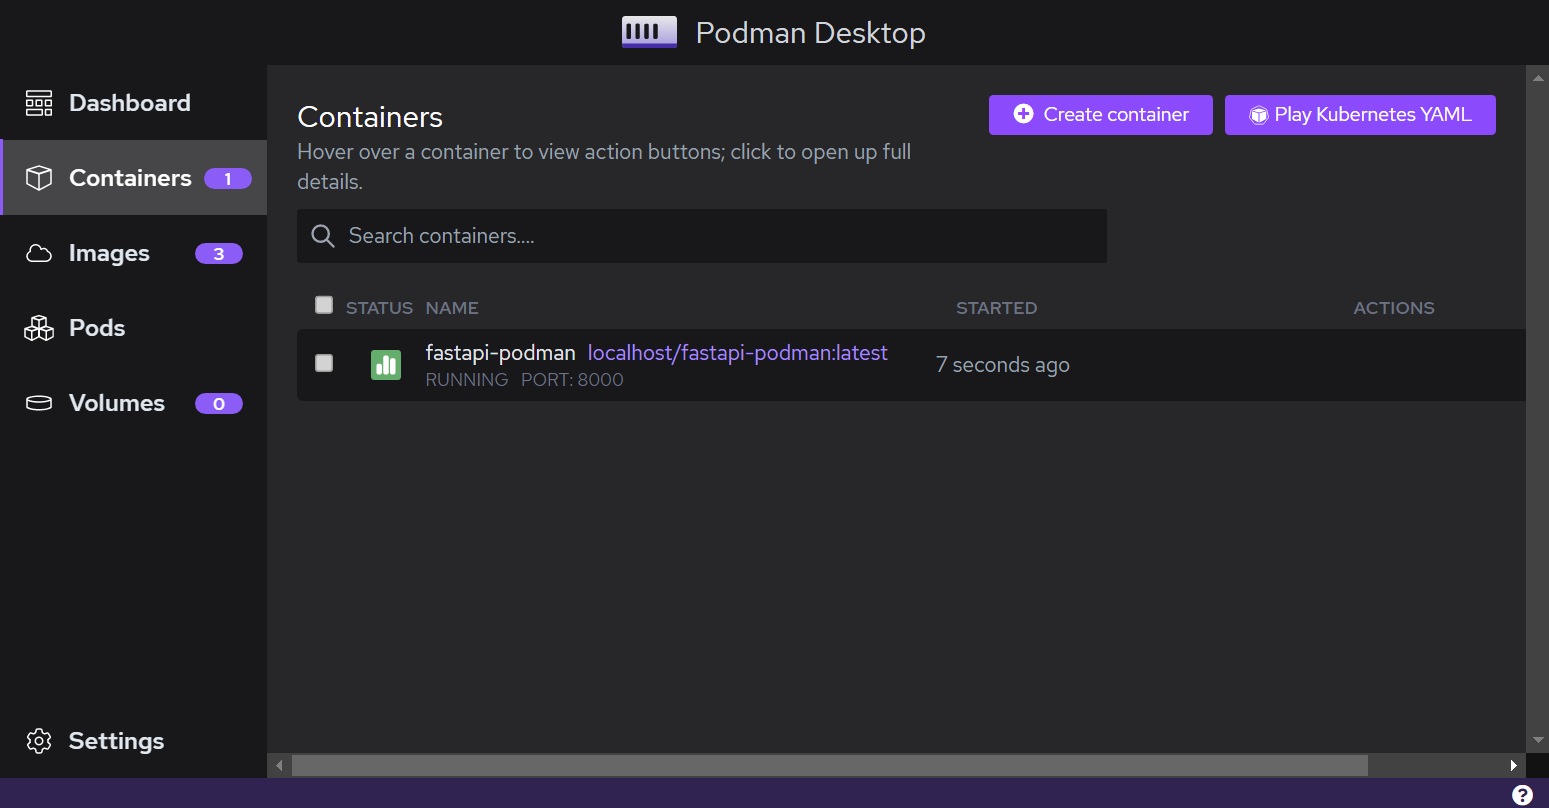
Or using the desktop client in the Containers dialog:
Testing and logging
Performing the same request to the same endpoint as before (curl localhost:8000) gives us back the same JSON response. We can also follow the output of the standard logging of the running app that the container produces, using similar commands to Docker:
podman logs -f fastapi-podman

INFO:     Started server process [1]
INFO:     Waiting for application startup.
INFO:     Application startup complete.
INFO:     Uvicorn running on http://0.0.0.0:80 (Press CTRL+C to quit)
INFO:     Uvicorn running on http://0.0.0.0:80 (Press CTRL+C to quit)
INFO:     10.88.0.2:57182 - "GET / HTTP/1.1" 200 OK
INFO:     10.88.0.2:57182 - "GET /favicon.ico HTTP/1.1" 404 Not Found
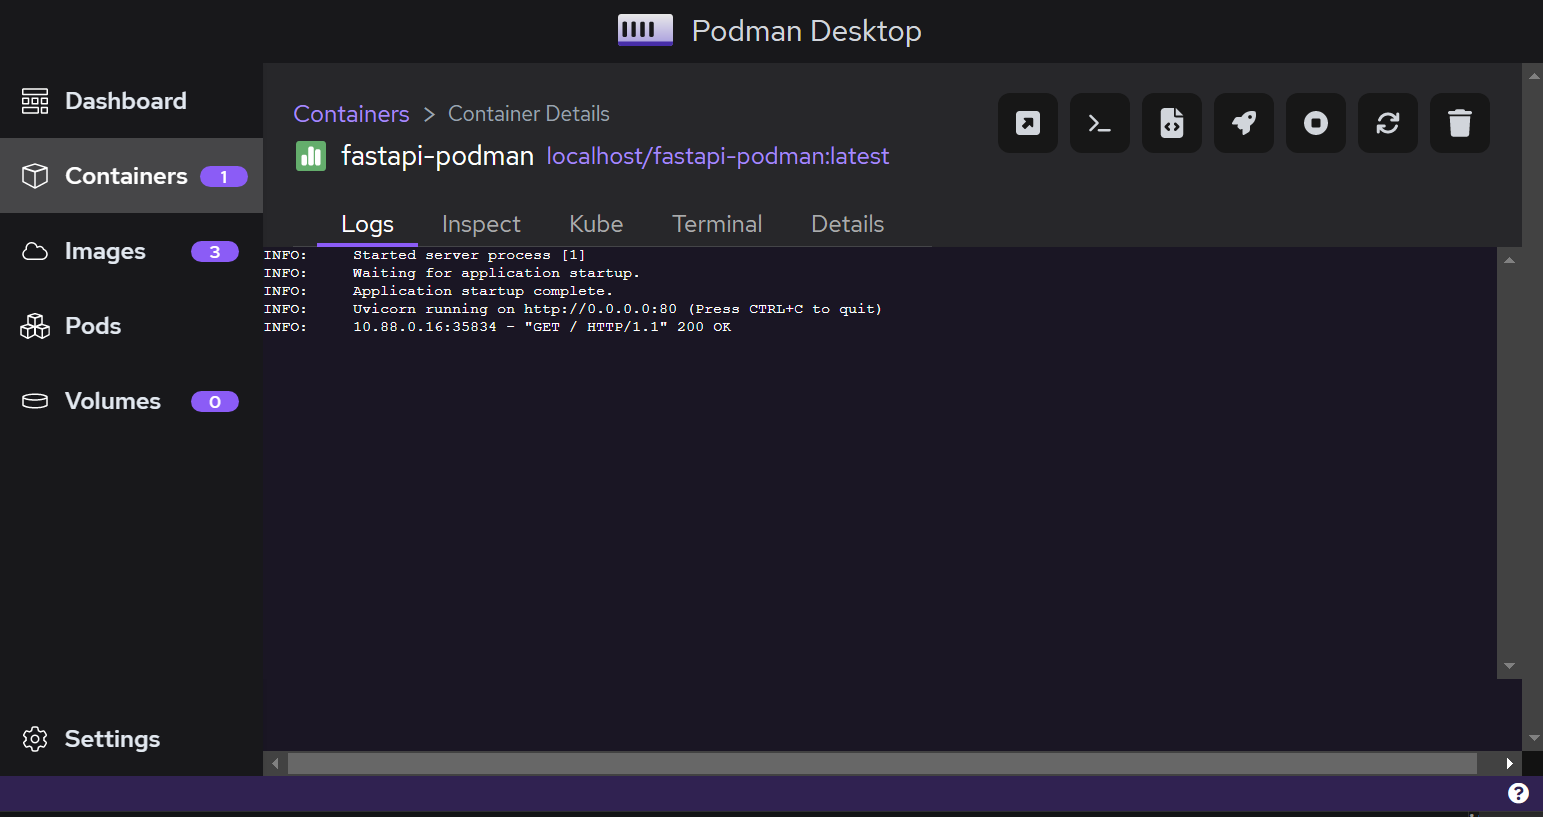
...or again through the desktop client itself:
Summary
Impressive work by the Podman team, so far I had a very positive experience using their CLI and desktop client. I am definitely looking forward to use Podman in more projects.
You can find the full example containing the code used in this post, along with instructions on how to install and run Podman with a comprehensive README in a repository on my personal GitHub.